Edit Content

Services
Auto Body Supplies
Specialty Paints
Helpful Links

Services
Auto Body Supplies
Specialty Paints
Helpful Links

At Auto Paint Depot, we understand that maintaining your vehicle’s appearance is important, whether it’s for resale value, personal pride, or just keeping your car looking like new. Automotive touch up paint is an easy and cost-effective way to restore your car’s finish without the need for expensive body shop repairs. If you’ve noticed small chips, scratches, or scuffs on your vehicle, it’s time to roll up your sleeves and tackle the job yourself. Here’s a simple, step-by-step guide on how to use automotive paint to touch up your vehicle.
Before diving into the steps, let’s quickly talk about why automotive touch up paint is a great solution for minor imperfections. Chips and scratches on your car not only impact its appearance but can also expose the underlying metal to rust and corrosion. By touching up these areas with the right car touch up paint, you can protect your vehicle from further damage and keep it looking great for years.
To get started with your automotive paint touch up, you’ll need the following items:
You can find all of these supplies at Auto Paint Depot, where we offer a wide range of touch up paints for cars in various colors and finishes to match your vehicle’s original paint.
The first step in the car touch up paint process is ensuring the damaged area is clean and smooth. Use a microfiber cloth to wipe down the area and remove any dirt or debris. If there’s any wax, grease, or oil on the surface, use a wax remover to get rid of it.
Next, use fine-grit sandpaper (around 2000 grit) to lightly sand the edges of the chip or scratch. Sanding helps the new automotive paint adhere better and creates a smooth surface for the touch-up job. Be gentle—you’re just roughing up the edges, not sanding the entire area.
Use masking tape and plastic sheets or painter’s tape to cover surrounding areas that you don’t want to get paint on. This will help you avoid getting excess touch up paint for cars on nearby surfaces like windows, trim, or tires. Take your time to carefully tape off the area, ensuring clean lines.
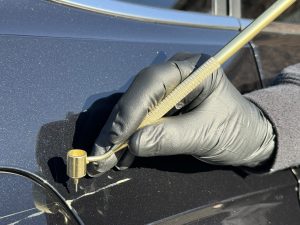
Now comes the fun part: applying the automotive touch up paint. If you’re using a brush or applicator pen, take extra care to apply the paint in thin layers. It’s better to build up the paint in multiple coats than to try to apply it all at once. You’ll want to apply just enough car paint touch up to cover the area without overfilling.
Start by applying the first coat of automotive touch up paint. Let it dry for about 10-15 minutes, then check the area. If necessary, add a second coat. You may need a third coat for larger chips or deeper scratches.
Once your automotive paint has dried completely, it’s time to add a clear coat. This step is crucial for protecting your touch-up and restoring the glossy finish of your vehicle. Simply apply the clear coat over the painted area in light, even layers. This will help prevent future chips and give the repaired spot a glossy, factory-like finish.
After the clear coat has dried, take a rubbing compound or polish and gently buff the area to blend the touch-up paint with the surrounding surface. This will help remove any excess paint and give the repaired area a smooth, shiny finish. Be gentle with the polishing to avoid damaging the paint.
Once you’ve applied the final polish, allow the area to cure for 24 to 48 hours. During this time, avoid washing the car or exposing the area to harsh weather conditions. This will allow the paint to fully bond and harden.
While automotive touch up paint is perfect for small chips and scratches, larger areas of damage, like deep dents or significant paint peeling, may require professional attention. In these cases, it’s a good idea to consult a local body shop or paint specialist for a more comprehensive repair.
Using automotive touch up paint is a great way to save time and money while keeping your vehicle looking its best. Whether you’re dealing with minor chips, scratches, or scuffs, following the steps outlined above will help you restore your vehicle’s appearance quickly and effectively. Remember to choose the right car touch up paint and tools, and always take your time for the best results.
At Auto Paint Depot, we offer premium automotive touch up paints and custom color matching services to help you get the perfect paint for your vehicle. Ready to get started? Visit our website today or contact us for expert advice on the best automotive paint for your car.
Happy painting!
CALIFORNIA PROPOSITION 65 WARNING: CANCER AND REPRODUCTIVE HARM
©2024 THE AUTO PAINT DEPOT, ALL RIGHTS RESERVED. | THEME & DESIGN BY: APPLE ORANGE MARKETING